Minium Core and Minium Developer (javacript editor)
In this training, we'll take a look into Minium Core, and we'll use
Minium Developer to write some Minium javascript code. We'll learn its concepts,
namely WebElements and Interactions, as well as interaction listeners.
We'll also make use of some tools provided by Minium Developer to helps us write
Minium code and evaluate it.
Installation
Download Minium Developer
- Download Minium Developer for your platform.
- Extract the archive.
Run Minium Developer
To launch Minium Developer, double-click on the executable located in the folder where you uncompressed it:
- Windows:
minium-developer.exe(if you want to run Minium Developer from theProgram Filesfolder, you need to run it as administrator) - Linux or MacOS:
minium-developer
Javascript Console
Once Minium Developer is open, you can see an javascript console where you can evaluate minium and javascript code:

- In the javascript console, write the following code:
// opens Minium Mail sample app
browser.get("http://minium.vilt.io/sample-app");
- Click on the button
Evaluateor use the commandCtrl + Enter - You will see a modal to launch a WebDriver browser where you can run your tests against to:
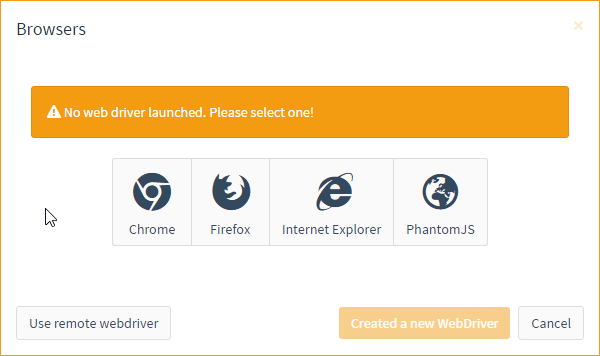
- Select a WebDriver (e.g. Chrome)
- Click on
Create - Check that a WebDriver was launched, and that Minium Mail sample app was opened
Minium Developer allows you to program Minium scripts in Rhino javascript.
Variables scope
When we evaluate some javascript in Minium Developer, all variables declared we'll be maintained in the evaluation global scope. That means that, the next time you evaluate something, all previously declared variables are still available.
For instance, evaluate the following code:
var name = "World";
Now you can evaluate the following code:
"Hello " + name // it evaluate into "Hello world"
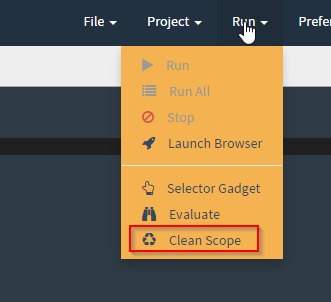
If you want to clear the global scope, so that all variables are removed from
it, you can do it by clicking in Run > Clean scope:
After that, if you try to run the previous code, it will fail:
"Hello " + name // ReferenceError: "name" is not defined
Minium Concepts
WebElements
WebElements and its parent class Elements are the most important concept in
Minium. They represent an instruction (from now on, we'll call them Minium
expressions) that will eventually evaluate into elements that we want to
interact with.
WebElements are normally lazy (there are some exceptions), and they can be
evaluated several times with different results, which means that the same Minium
expression can be reused. Besides, its chainable method API always returns
a new Minium expression, so Minium expressions are by nature immutable.
Consider the following Minium expression:
sentNavItem = $("#folders-nav").find("a").eq(2);
That expression itself does not communicate with the browser, because it was not evaluated yet. For an expression to be evaluated, one of the following invocations need to occur:
- A method with a return value other than a subclass of
Elements(parent class ofWebElements) is invoked, like:
sentNavItem.text();
- An interaction method is called:
sentNavItem.click();
Interactions
Interactions are another key concept in Minium. They represent user interactions
with the browser, like clicking, filling input fields, or even waiting that some
element exists. Objects that can perform interactions are known as
Interactable. Typically, all Elements / WebElements are interactable. The
Interactable interface provides interactions behind methods like .click() or
.fill().
The most important Interactable interfaces are:
MouseInteractable: allows mouse operations with elements, like clicking, moving mouse around, etc.KeyboardInteractable: allows keyboard operations with elements, like pressing a key, typing text, etc.WaitInteractable: wait conditions on elements
Interactions have a very important behaviour: they try the best they can to fulfill their task. For instance, let's say we have the following expression:
field = $("input").withLabel("Subject");
This expression represents input elements with a label Subject (which matches
the subject field in the compose form).
Now let's try to interact with it:
field.fill("Minium can!");
At this point, we have an interaction being called, and for that reason Minium
will evaluate field. If Compose button was not pressed yet, and therefore
the compose email form is not shown, then field will evaluate to an empty set,
and for that reason, it cannot be filled with text. At this point, Minium will
wait a specified interval period and then retry the evaluation. Two situations
may occur:
- Eventually, the expression evaluates to a non-empty set. Minium will then grab the first element of that evaluated set and will fill it with the specified text.
- the expression keeps evaluating to an empty set, and the total period
surpasses a specified
timeoutperiod. At this point, interaction is aborted and aTimeoutExceptionis thrown.
For that expression to succeed, try to:
- Evaluate
field.fill("Minium can!") - Manually click
Composebutton before timeout occurs, which is 5 seconds - Once the form opens, you'll see the
Subjectfield will be filled properly.
Selector Gadget
Minium comes with Selector Gadget.
It allows developers to pick elements in the browser. You can either trigger
that functionality with Ctrl + Shift + C or by pressing the button
Selector Gadget:

After pressing it, you'll notice that, in the browser for the web driver you're running, a new toolbar at the bottom of the page will be displayed:

Besides, you can now start picking elements in the page: just click on a page element that you would like your selector to match (it will turn green). Selector Gadget will then generate a minimal CSS selector for that element, and will highlight (yellow) everything that is matched by the selector. You can then click on a highlighted element to reject it (red), or click on an unhighlighted element to add it (green).
Holding 'shift' while moving the mouse will let you select elements inside of other selected elements.
Exercise:
Let's try to select the Tags table header cell.
- Ensure your web driver browser is at Minium Mail sample app:
browser.get("http://minium.vilt.io/sample-app/");
- Position your cursor where you want to insert the generated code
- Start Selector Gadget
- On the web driver browser, click on
Tagstable header cell:

- You'll notice that the cell you clicked became green, and other table headers cells became yellow. That means that the CSS selector it generated also matches those yellow cells
- Now click any of those yellow cells to reject it (for instance,
Subject)

- You'll notice that cell became red, and cells that were yellow are no longer
selected. That's because, by rejecting the
Subjectcell, Selector Gagdet tried to get a CSS selector that kept matching the green elements but excluded red elements, and that new CSS selector no longer matches the other yellow cells. - Now that only one cell is matching, and it is the one we want, we can accept that CSS selector by accepting it in Minium Developer:
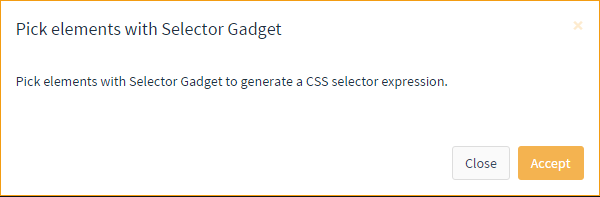
- You'll now notice that Minium Developer inserted the following Minium expression in your editor, at the place where your cursor was:
$("th:nth-child(2)")
- You can now evaluate it, by ensuring your cursor is at that line, and by
pressing
Ctrl + Enter. This will highlight all matching elements (in this case, theTagsheader cell).
Note: Alternative ways to get the same cell using filters: use the selector gadget to select all header cells (you just need to click one, the others will became yellow), and then select it using either:
$("th").eq(1)(by index)$("th").withText("Tags")(by its text)
Exercise:
Try to use Selector Gadget as much as possible to write instructions for sending
an email. You can use interaction methods, like .click(), .fill(text),
.select(option) (for select fields), and even use filter methods, like
.withText(text) (it will only return matching elements that have that exact
text).
For instance, to click the Compose button:
$("#compose").click();
Minium Recorder
If you have Minium Developer Prime, you will have access to a Minium Recorder.
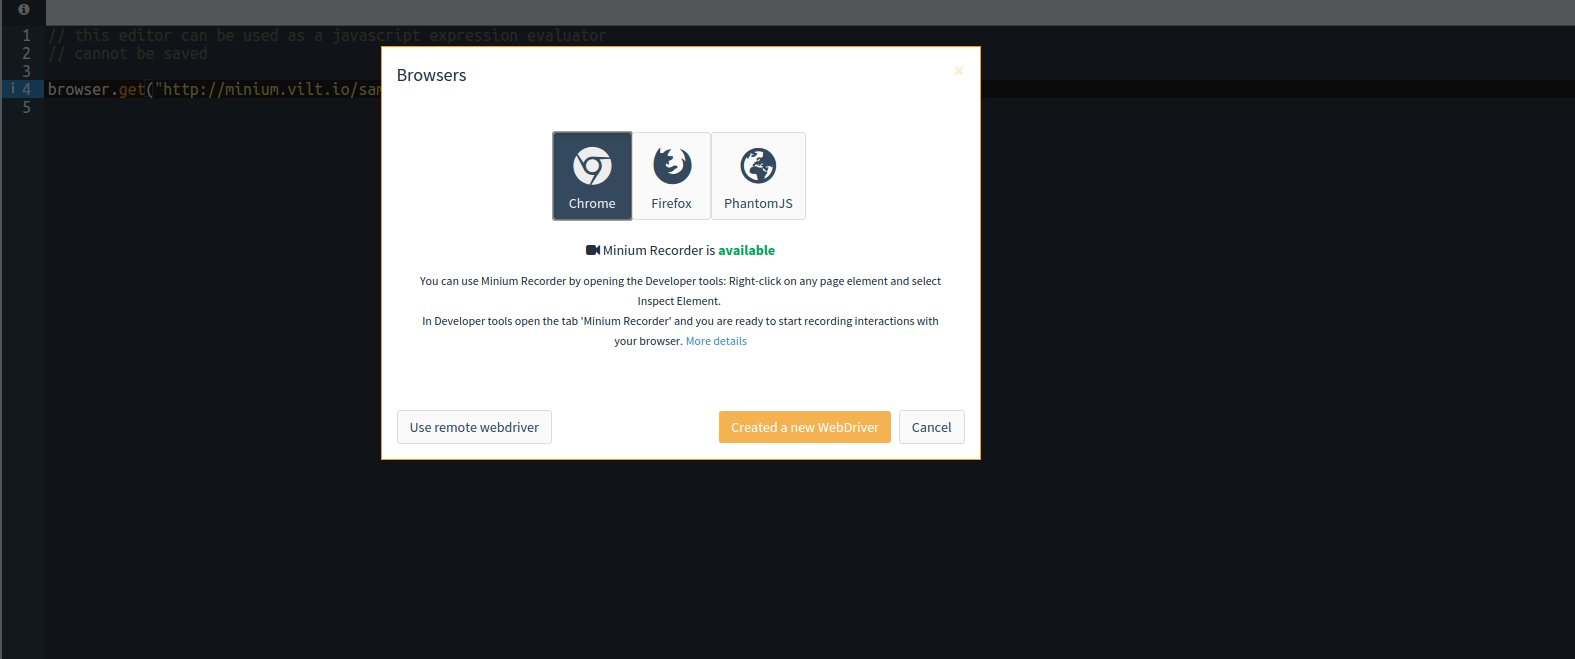
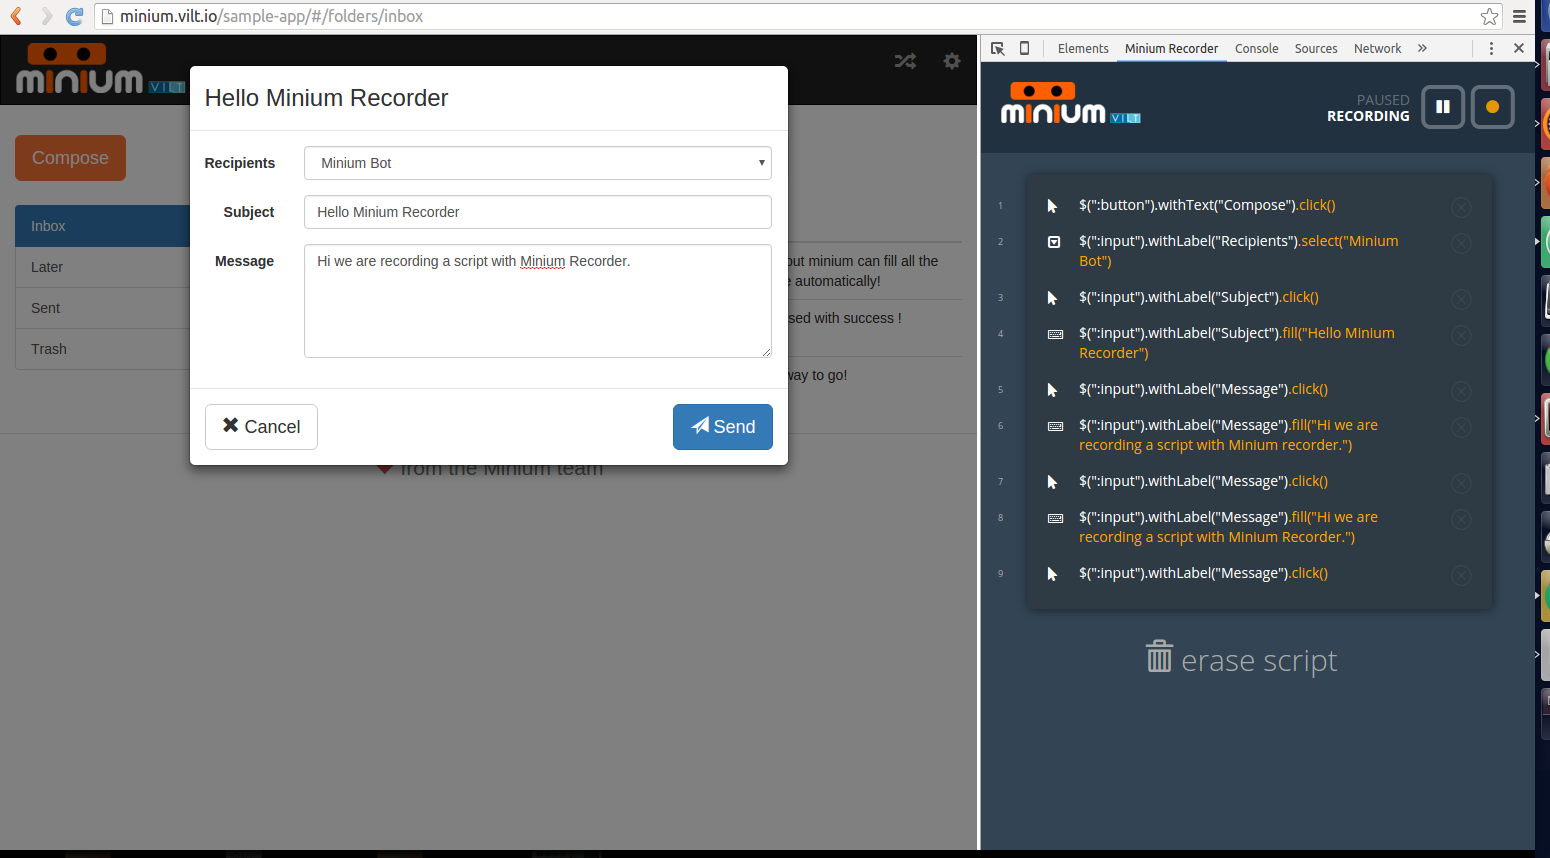
Minium Recorder records your interactions with the browser.
To start recording, click on the following button:
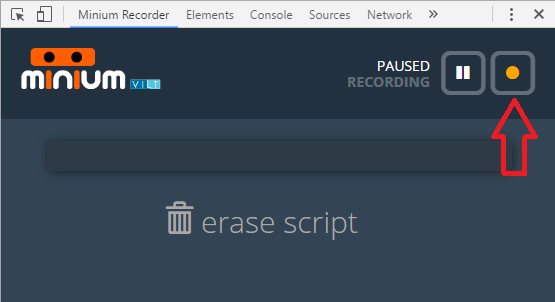
From now on, every interaction that you perform with the browser will be registered.
If you are not satisfied with an expression, click on the expression and a list of alternative expressions will be displayed:
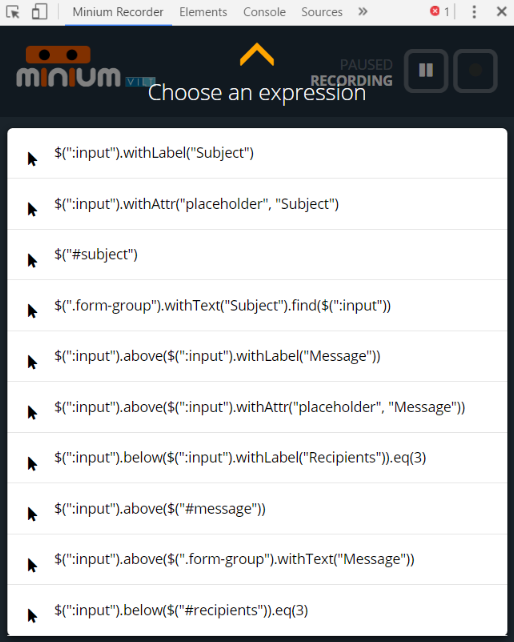
To select an expression, just click on it.
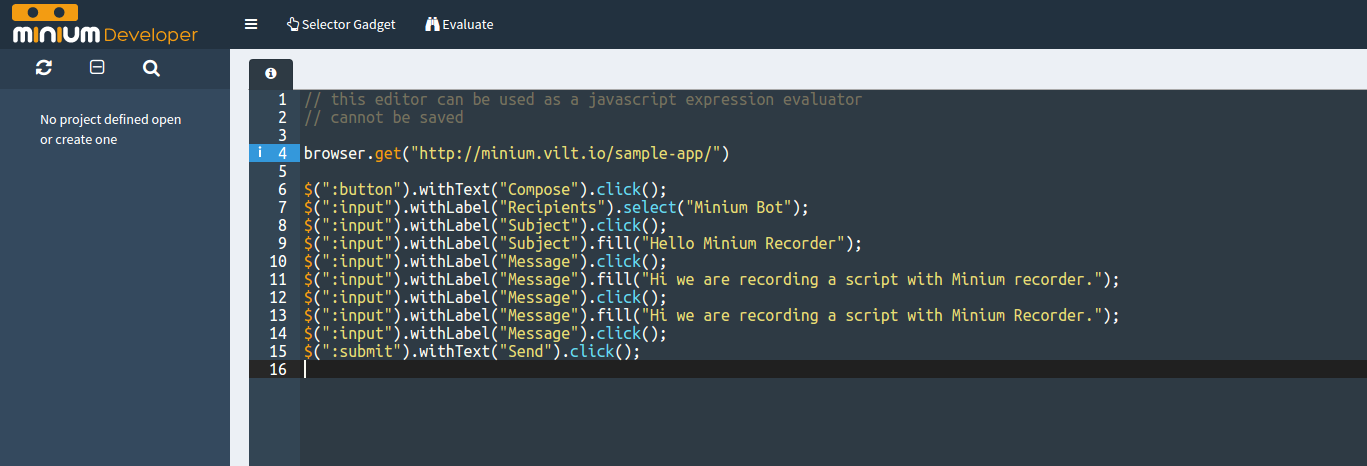
Once you're done, click "Import recorded script" and the script will be immediately available in Minium Developer.

Select cells in tables
Selecting cells in tables based on their values and columns can be hard. Minium has some functions that ease that process, as we will see. So, first things first: let's ensure our browser is at Minium Mail Inbox:
browser.get("http://minium.vilt.io/sample-app/#/folders/inbox");
Then let's get variables to identify both table headers and table value cells:
var headers = $("#mail-list th")
var cells = $("#mail-list td");
var recipientsHeader = headers.withText("Recipients");
var recipientsCells = cells.below(recipientsHeader);
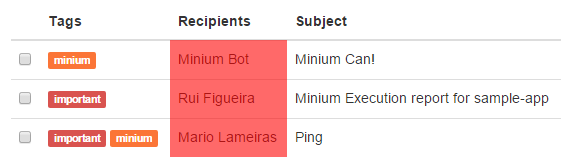
We can now filter cells with "Minium Bot" on it, for instance:
var recipientCell = recipientsCells.withText("Minium Bot")
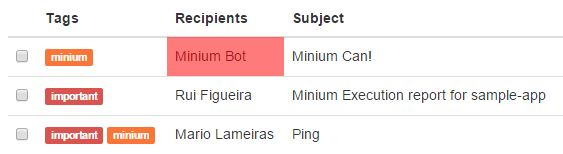
Now it's easy to click the checkbox of that row:
var itemCheckbox = $(":checkbox").leftOf(recipientCell);
itemCheckbox.click(); // this will toggle the checkbox
JQuery methods
Minium API is intentionaly very similar to JQuery so that it's very easy for developers that are familiar with JQuery to start working with Minium. Besides, CSS selectors also support JQuery extensions.
Some examples of JQuery valid expressions that also work in Minium:
// gets the button element with index 4 (note that it's 0-based)
$("button").eq(4);

// gets table rows for all table header cells in the page
$("th").parents("tr");

// retuns all unchecked checkboxes
$(":checkbox").not(":checked");
Note: Try to avoid getting values from elements. Minium provides some jquery methods for accessing values from WebElements, like '.text()', '.attr(name)', etc. However, these methods will always evaluate immediatelly, which can be a problem, because Minium cannot ensure their evaluation occurs when it actually evaluates into a non-empty set. For that reason, it should be avoided.
Instead, filters are provided to restrict elements based on a specific value:
// gets element by text
$("th").withText("Tags");

// gets element by style value
$("button").withCss("visibility", "visible");
In case you really need to get some value, consider chaining the method call with a .waitForExistence():
var elemText = $("#compose").waitForExistence().text();
// or getting a style value
var backgroundColor = $("body").waitForExistence().css("background-color");
Base Expression pattern
The concept behing the Base Elements expression is that it should represent the root elements of the UI that can be interacted with.
For instance, when Modal elements are displayed (for instance, a bootstrap
modal dialog) we want base to evaluate to that modal element, therefore
excluding all elements that are behind the backdrop element.
Then, by using base as the root of our elements expressions, we can get some assurance that we are getting the right elements instead of getting elements that are not interactable (or should not be interactable) at that point.
To demonstrate how useful this pattern can be, let's do a simple exercise: we'll start composing an email and then we'll try to click the first button it finds:
browser.get("http://minium.vilt.io/sample-app/");

// this will open the New message modal dialog
$("#compose").click();

// let's try to click the first available button
$("button").click();
If we try to evaluate that code, it will fail. That's because
$("button").click() will try to click the first matching button (which is the
Compose button), and that one is under the modal backdrop and for that reason,
it is not accessible for interactions.
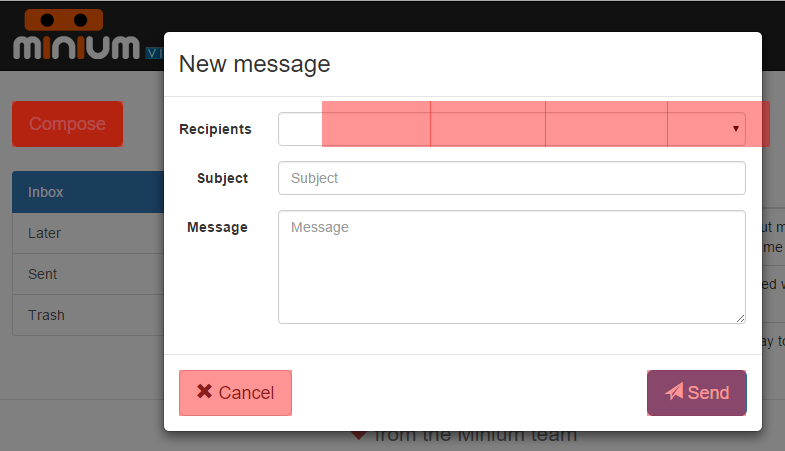
You can try to evaluate $("button") and you'll see that lots of buttons in
the page will highlight, both the ones that are in the modal dialog and the ones
in the main page, that are not accessible due to the modal backdrop:
So, let's consider the following base expression:
base = $(":root").unless(".modal-backdrop").add(".modal-dialog");
Let's try to explain what it does:
- the first part,
$(":root").unless(".modal-backdrop"), evaluates the page root element when no modal backdrop exist (that is, when no modal dialog is open) - the second part,
.add(".modal-dialog"), adds modal dialog elements. Note that, when a modal dialog is available, this second part evaluates into that element, but the first part will evaluate into an empty set because of the existence of the modal backdrop
So, basically that expression evaluates into the root element or into an opened
modal dialog, but never both at the same time. If we try to evaluate base
when a modal dialog is opened:
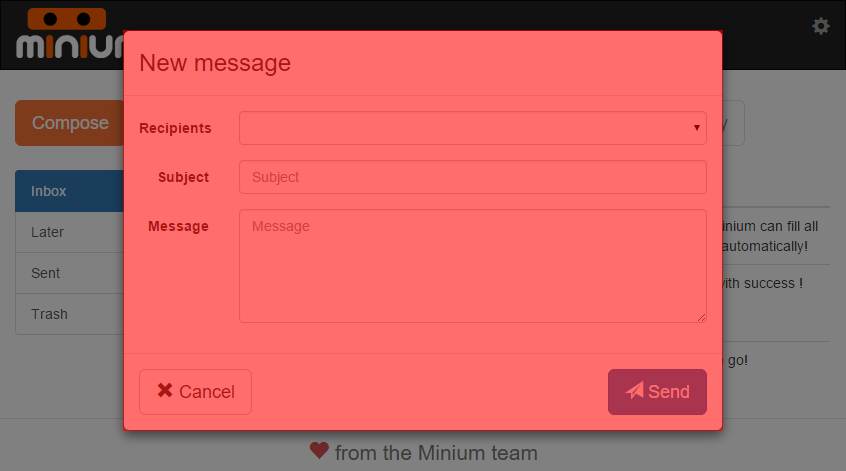
So, if we use base as our "root" for finding elements in the page, we can now
restrict them to accessible ones.
Try to evaluate the following expression with the modal dialog open now:
base.find("button")
You'll see that only buttons inside the modal dialog were highlighted:

And now the following code will evaluate successfully:
browser.get("http://minium.vilt.io/sample-app/");

var base = $(":root").unless(".modal-backdrop").add(".modal-dialog");

// this will open the New message modal dialog
base.find("#compose").click();

// let's try to click the first available button
base.find("button").click();
Waiting interactions and presets
Sometimes, it is necessary to wait that some element is displayed on the page or not. For instance, a spinning wheel is often displayed to indicate that the application is doing something in background, and therefore you should wait until it disappears.
In Minium Mail sample app, it shows a spinning wheel after you perform some operation.
Let's try to delete an email item and then compose another one:
browser.get("http://minium.vilt.io/sample-app/");

var mailItemCheckbox = $(":checkbox");
var removeBtn = $("#remove-action");
var composeBtn = $("#compose");

mailItemCheckbox.click();
removeBtn.click();
composeBtn.click();
If you run that script all at once (select it all and press Ctrl + Enter),
you'll notice it will fail when trying to click the Compose button. The
reason is that the spinning wheel is being displayed and it "blocks" elements
behind the backdrop form being interacted with. So, we need to wait for that
spinning wheel to disappear before we can click the Compose button. We can do
that with the .waitForUnexistence() method:
browser.get("http://minium.vilt.io/sample-app/");

var loading = $(".loading").withCss("display", "block");
var mailItemCheckbox = $(":checkbox");
var removeBtn = $("#remove-action");
var composeBtn = $("#compose");

mailItemCheckbox.click();
removeBtn.click();
loading.waitForUnexistence();
composeBtn.click();
The interaction loading.waitForUnexistence() will wait at most for a specified
amount of time (by default, 5 seconds) that the element doesn't exist. After
that time, it will fail, otherwise, as soon the element disappears, it will
proceed.
However, it is possible that the spinning wheel takes more than 5 seconds to disappear. Remember that, in real world applications, the spinning wheel is normally associated with time-consuming operations that involve AJAX requests.
In those situations where we know that it will probably take more time, we need to ensure it will wait using a different timeout.
Minium Mail lets us configure the loading time and that way we can simulate a time-consuming operation. The following code will change the loading time to be 8 seconds:
browser.get("http://minium.vilt.io/sample-app/");

var configBtn = $("#configure");
var loadingTimeFld = $("#loading-time-seconds");
var saveBtn = $("#config-save");

configBtn.click();
loadingTimeFld.fill("8");
saveBtn.click();
Note that the loading time gets reset every time we refresh the page, so we
won't reload the page using the browser.get(...) method. If you do, you need
to change the loading time again.
If we now try to run the same interaction code as we were running before:
mailItemCheckbox.click();
removeBtn.click();
loading.waitForUnexistence();
composeBtn.click();
it will fail with a TimeoutException. That's because
loading.waitForUnexistence() timeout is 5 seconds and now the spinning wheel
is displayed for 8 seconds.
To fix it, we need to use waiting presets, which are basically labelled timeouts and polling intervals.
The following code creates two waiting presets, fast and slow:
// we need to load a module, we'll talk about this later
var timeUnits = require("minium/timeunits");

// browser configuration
browser.configure()
  .waitingPreset("fast")
    .timeout(1, timeUnits.SECONDS)
  .done()
  .waitingPreset("slow")
    .timeout(10, timeUnits.SECONDS)
    .interval(1, timeUnits.SECONDS)
  .done();
If we now use slow waiting preset when calling .waitForUnexistence(), it
will now wait at most 10 seconds instead of 5 seconds, and that way it will
work:
mailItemCheckbox.click();
removeBtn.click();
loading.waitForUnexistence("slow");
composeBtn.click();
Note: There is a special waiting preset, immediate, that doesn't wait at
all. Besides, you can use .checkForUnexistence() / .checkForExistence() to
determine if any matching element exists or not without failing:
loading.checkForUnexistence("immediate") // returns true or false immediately
Interaction Listeners
Having to explicitly wait every time a spinning wheel is displayed only adds complexity to the code. Besides, when we explain someone how to use some functionality in a site, we never tell them they need to wait until the spinning wheel disappears, because it is already assumed. The same way, we want minium to implicitly wait every time it sees a spinning wheel.
Interaction listeners are specially handy for these kind of situations, and also for error handling, like retrying some interaction when it fails. They intercept all interaction calls, and can perform additional logic before, after or when they fail.
ensureExistence / ensureUnexistence
These interaction listeners only allow the interaction to be performed after existence / unexistence or certain elements. In our case, we want to ensure that no spinning wheel is displayed in the page:
var loading = $(".loading").withCss("display", "block");

var loadingUnexistenceListener = minium.interactionListeners
  .ensureUnexistence(loading)
  .withWaitingPreset("slow");

// browser configuration
browser.configure()
  .interactionListeners()
    .add(loadingUnexistenceListener)
  .done();
We can now run the same code that removes and email and then starts composing
a new mail without having to call loading.waitForUnexistence():
browser.get("http://minium.vilt.io/sample-app/");

var mailItemCheckbox = $(":checkbox");
var removeBtn = $("#remove-action");
var composeBtn = $("#compose");

mailItemCheckbox.click();
removeBtn.click();
composeBtn.click();
Error handling
There are situations where some exception can be thrown. For instance, if during
some interaction an alert window is displayed, an UnhandledAlertException is
thrown. Of course, we can explicitly handle alert windows with
$(":root").alert().accept(), for instance, but if we cannot predict when the
alert window will be displayed, we may need to handle it once it occurs:
// always accepts window alerts
var unhandledAlertListener = minium.interactionListeners
  .onUnhandledAlert()
  .accept();

// browser configuration
browser.configure()
  .interactionListeners()
    .add(unhandledAlertListener)
  .done();
Another kind of errors that can happen is the StaleElementReferenceException,
which basically happens when we try to interact with an element that no longer
exists in the page (for instance, if the page was refreshed, which forces that
element to be destroyed in the browser).
In case you start getting these kind of errors, you can register the following interaction listener:
// always accepts window alerts
var staleElementReferenceListener = minium.interactionListeners
  .onStaleElementReference()
  .thenRetry();

// browser configuration
browser.configure()
  .interactionListeners()
    .add(staleElementReferenceListener)
  .done();
Timeout handling
It is also possible to handle timeout exceptions in a very advanced way. The following example shows an interaction listener that, when a timeout occurs, is triggered, and then checks if an loading element exists in the page. If it exists, it will wait for its unexistence with a provided waiting preset and then it will retry the interaction:
var timeoutListener = minium.interactionListeners
  .onTimeout()
  .when(loading)
  .waitForUnexistence(loading)
  .withWaitingPreset("slow")
  .thenRetry();

browser.configure()
  .interactionListeners()
    .add(timeoutListener);
Assertions
Minium includes Expect library for assertions, and extends it to add Minium-specific methods.
For instance, to assert the existence of an element:
var composeBtn = $("compose");

expect(compose).to.exist();
Or, if you want to check that some element has a specific text:
var composeBtn = $("compose");

expect(compose).to.have.text("Compose");
You can find more documentation on Assertions API.